Below are a list of our most common questions, and we are always expanding our FAQs. If you have a question that is not answered here, please scroll down to post a new question.
Your dashboard is like your control panel for your account. Here you can track all of your products, sales, and earnings.
In the My Account page, you can view all of your past orders. If your order includes a download link, you can access that link through the My Account page. Additionally, you will receive an email after your purchase with a link to your download. That link will not expire.
For physical products, this allows sellers to include a shipping cost into the total price.
- Register or Login.
- Click “Sell a Product” from the top menu bar.
- Fill out the form fields for your product including: Title, Description, Image, and Price.
Please click here to view a detailed tutorial on selling video material on TeachersTrading.com
There are 2 areas where you can upload product images: “Add Media” button and “Upload an image section”
Add Media Button
This tool allows you to upload multiple images of a product to be displayed as a gallery.
Upload an Image
This tool allows you to upload the Featured Image for a product. This is the main image that is seen throughout the site.
Tips for Uploading Images
Images should be at least 650 px wide
We only support JPEG or PNG images formats
If you have any questions or need some support, please do not hesitate to contact us
In Product Description, select Insert > Add Media
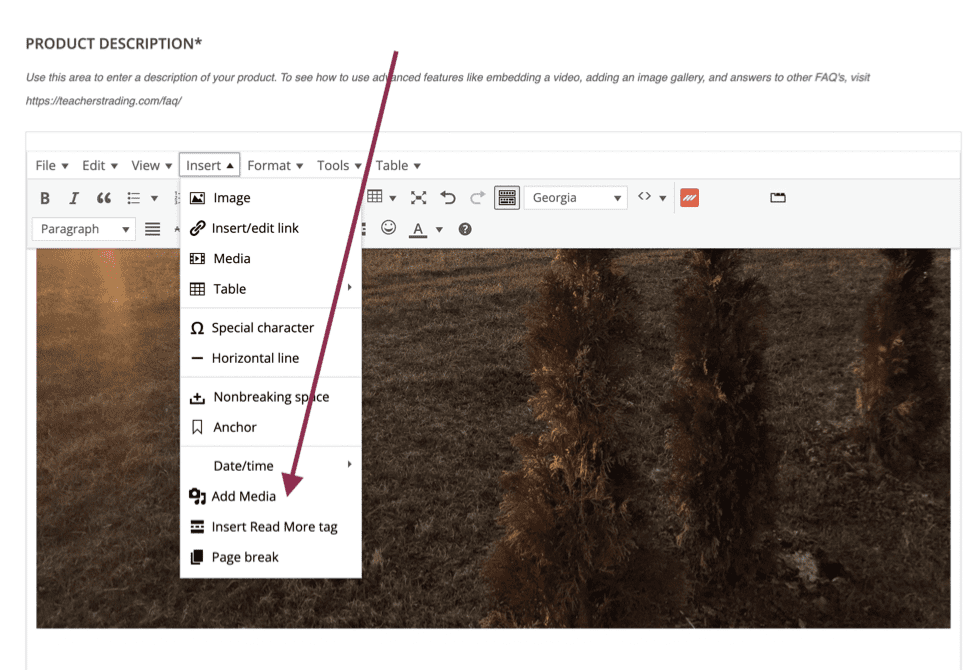
Select Create Gallery on left side menu of the pop up and upload your images
With your gallery images uploaded and selected, there are some options for the settings
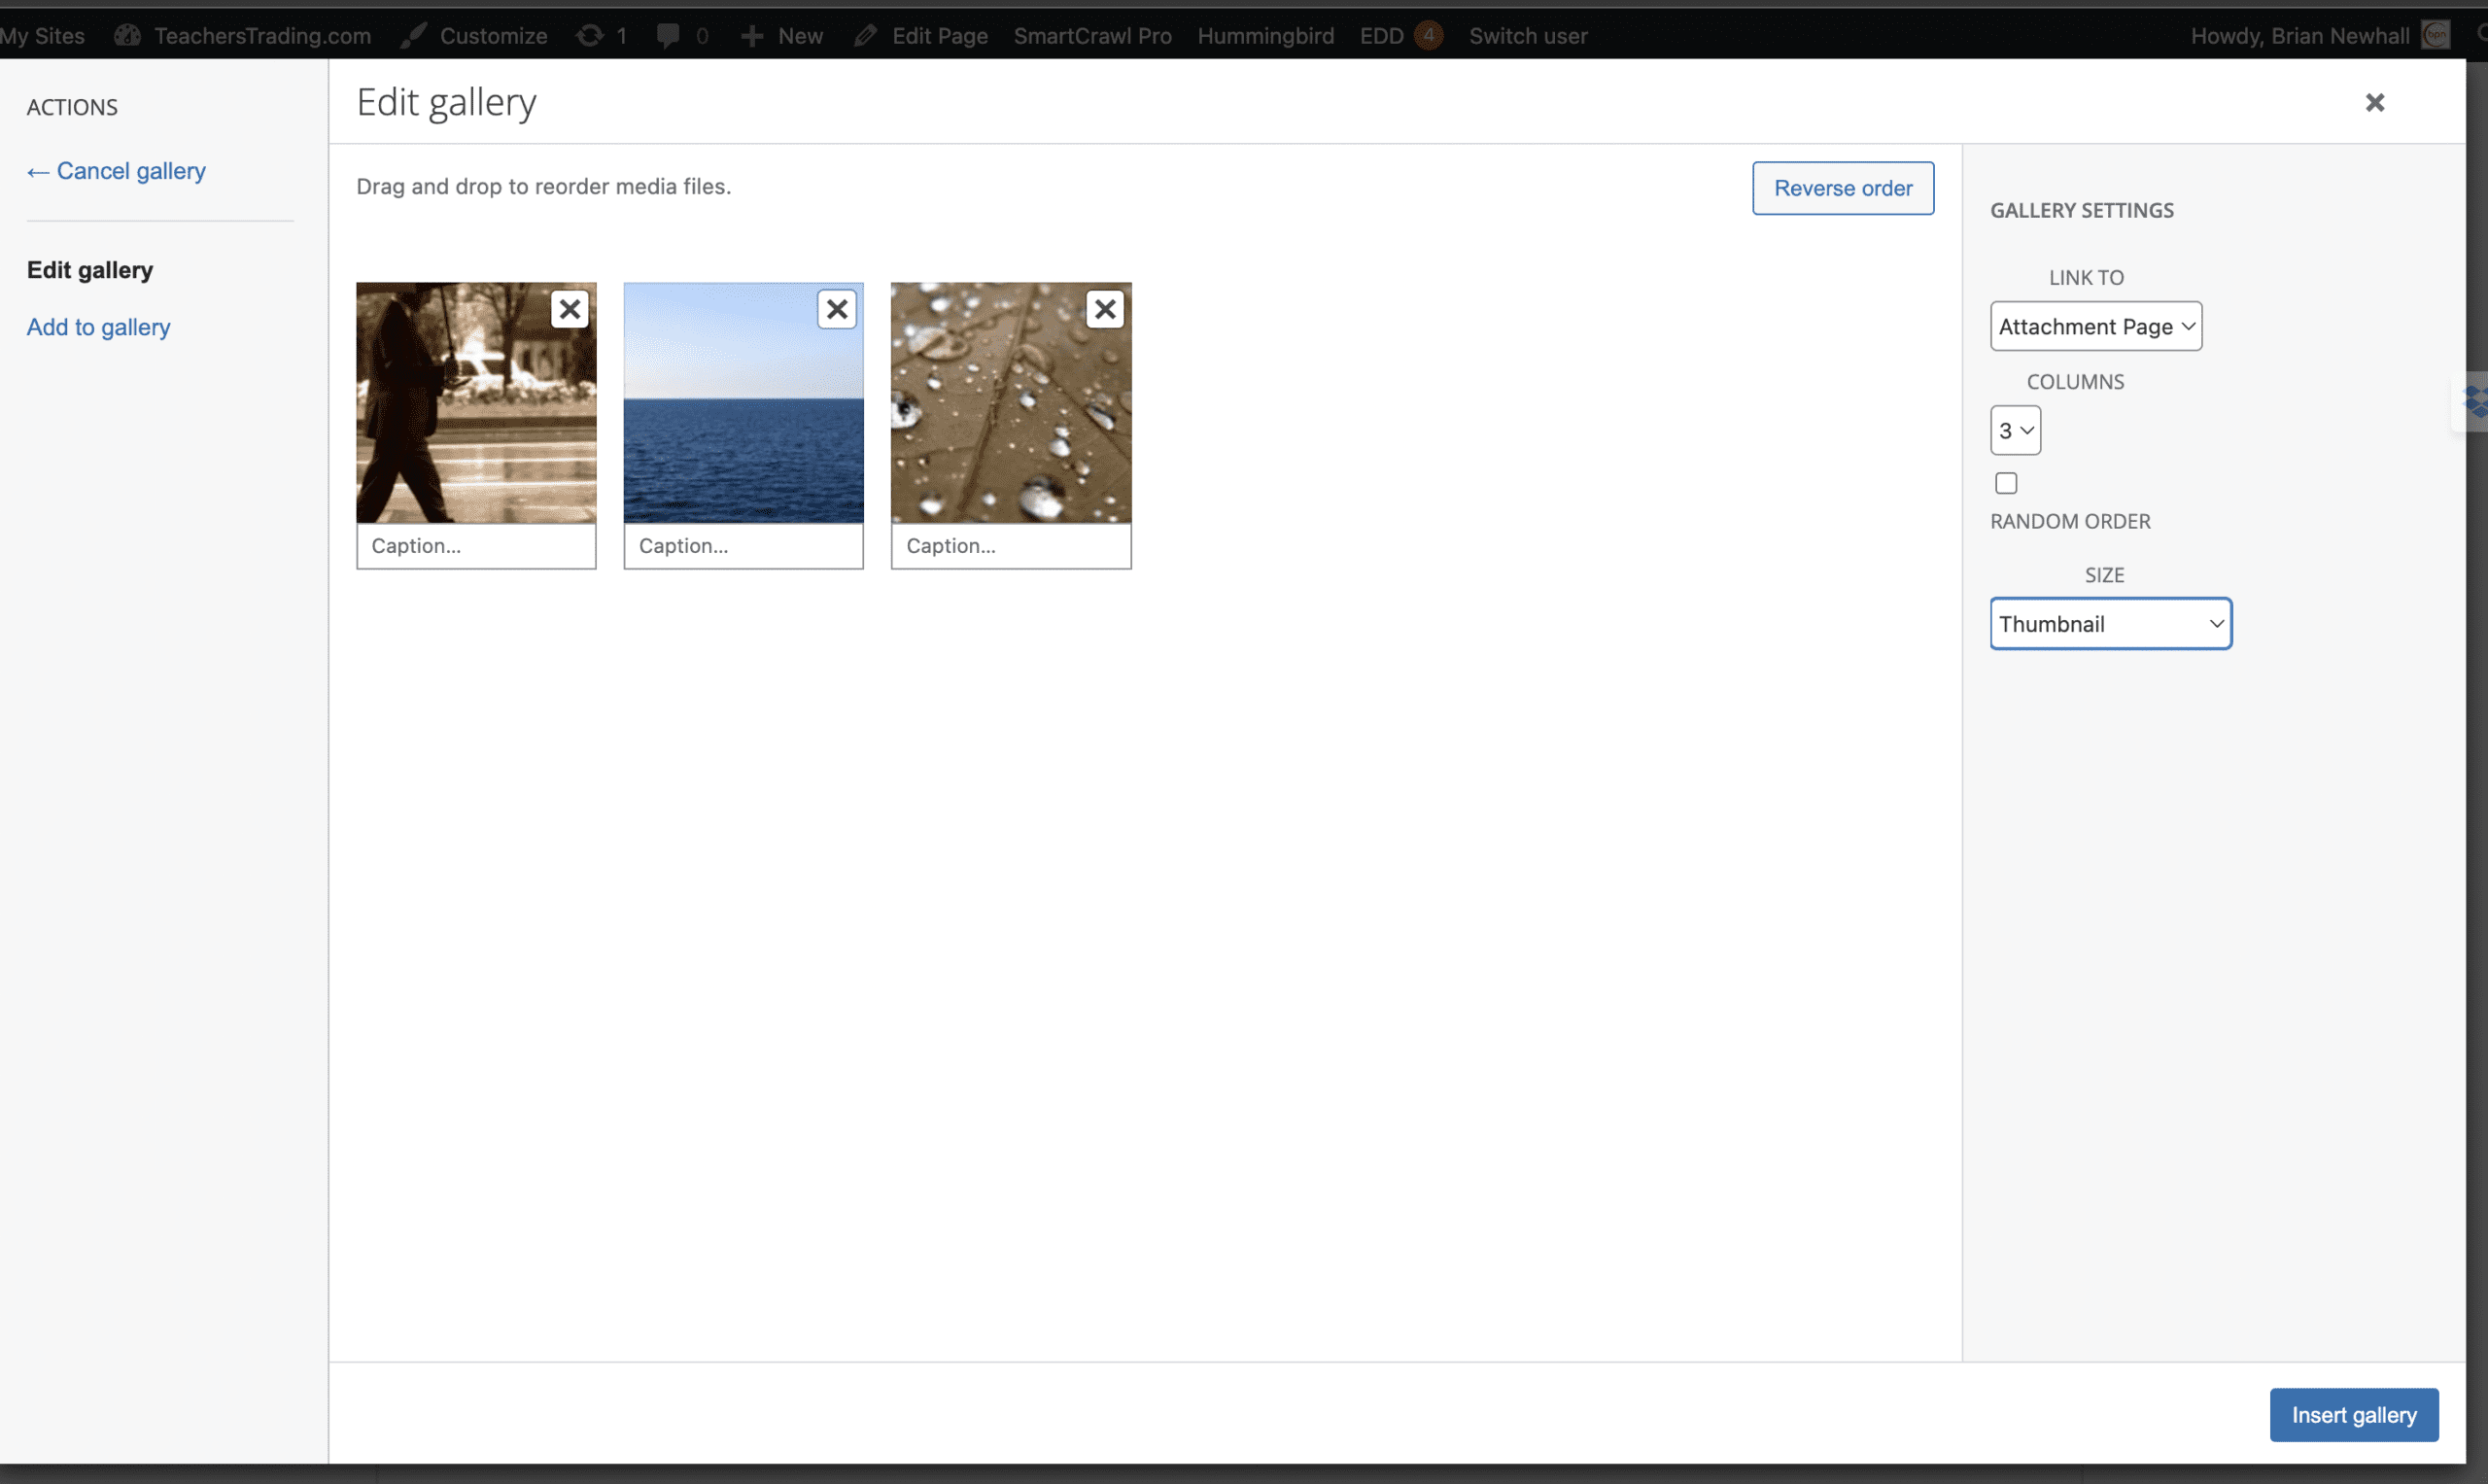
You can drag and drop the images to change order, and set how many columns you want them to display in.
Size options
- If you select full size, when a user clicks on the image, it will pop up in full screen and the cursor will turn into a magnifying glass that lets the user zoom in on any area of the image. There are no arrows to scroll through images at this setting
- If you select any size smaller than full size, images will still open when user clicks the image but there will not have the zoom in option with the cursor. There will be arrows for users to switch images in view.
After clicking the Insert Gallery button, the gallery will show as a gray box in the description editor.
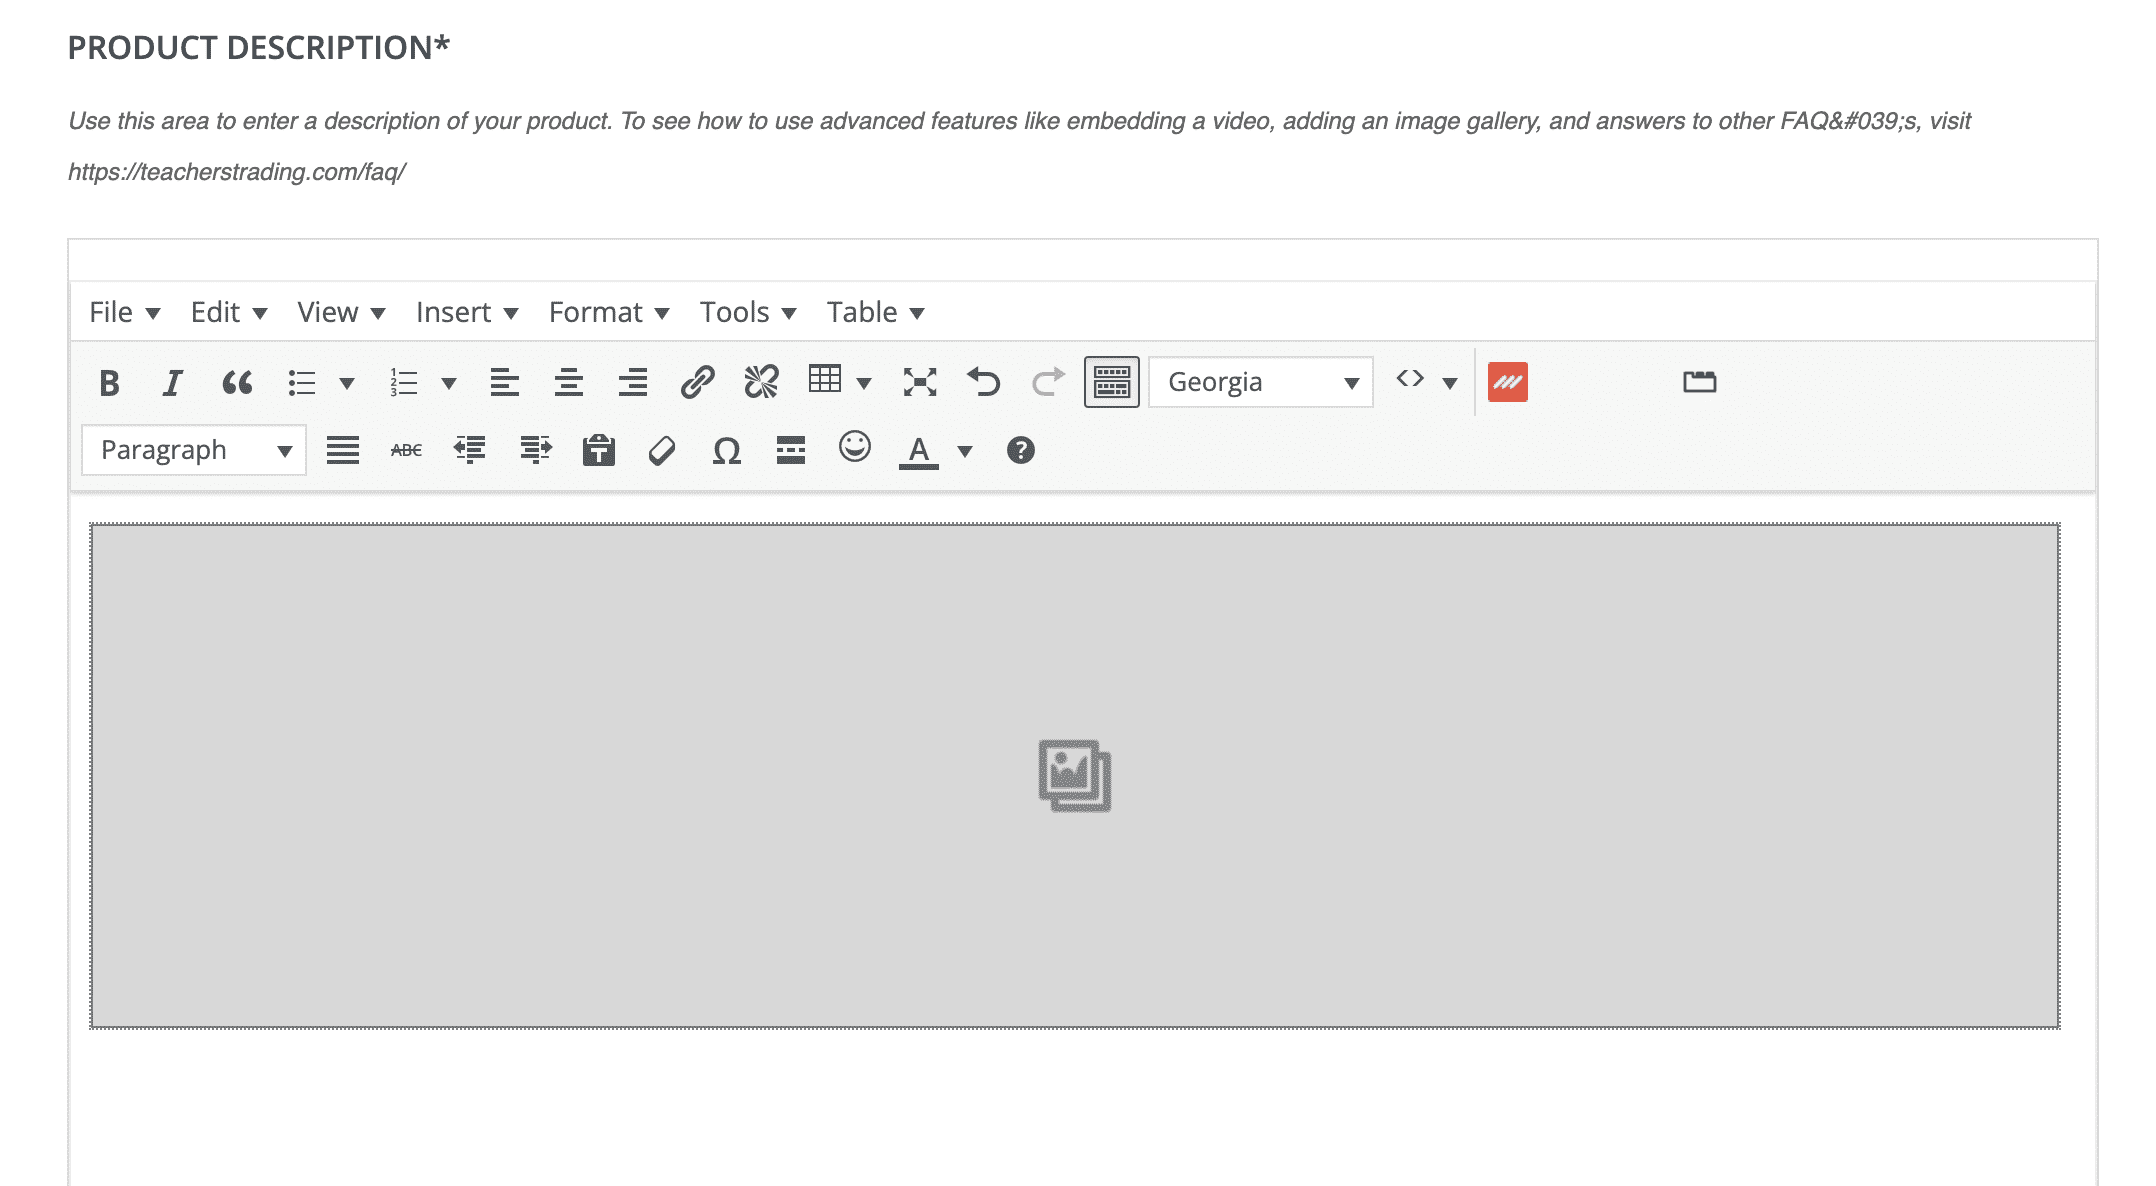
Double click the gray box to reopen your gallery settings to add or remove images and/or change settings
Please contact us and let us know of any categories or tags that you would like for us to add.
Membership refers to your state of having an account with Teachers’ Trading. Commission refers to the payment you receive for each sale. i.e. With my Teachers’ Trading membership, I receive an 80% commission for all of my products.
Commissions are sent out monthly and are paid through PayPal. We use the email address you registered with to send the PayPal payment. If you need to change your email, please send us a message.
Please note that adding an email address in your dashboard profile, DOES NOT update your email address for PayPal commission payments. The email you put in your dashboard profile only impacts what email is shown on your store page.
Click here to read instructions on uploading large files via 3rd party tools.
- Log in to Teachers’ Trading.
- Click “My Dashboard” from the Top Menu Bar.
- Click “Products” from the Dashboard Menu Bar.
- Next the relevant product, cick “Edit” in the Actions tab.
- Here you can make edits and adjustments to your product.
1. Have the URL for your Vimeo video ready.
2. In the dscription area, you will place the code below.
3. For Vimeo videos, Click here and copy the code. Paste the code into your description and replace the VideoURL with the URL of your video.
4. Continue adding your product information.
*Please keep in mind the terms and conditions for any 3rd party tool that you use. TeachersTrading.com does not accept any liability for your failure to comply with 3rd party terms.
A big part of selling your products involves the images and description that you post with your product. This tutorial outlines how to use some of the advanced tools that we have provided on the Product Submission Form.
How to add multiple images

By clicking on the Add Media button, you can upload multiple images into a gallery for your product. Once you click the button, click on Create Gallery in the left-hand menu. On this page, you can either select images from your media library or you can upload new images from your computer. To upload new images, click on Upload Image towards the upper-left of the screen, then click the Select Files button. Once your images have been selected, click on the Create Gallery button in the lower right. You have now added an image gallery to your product.
*Keep in mind that the main or “Featured” image will be uploaded in a following step of the Product Submission Form.
How to use the text editing features

In the description section, we have provided a number of text editing tools for you to enhance the look of your description. These options are similar to most word processors. With these tools you can create Bold, Italicized, and Underlined text. Here are the other tools:
- Strikethrough
- Bulleted List
- Numbered List
- Left Allignment
- Center Allignment
- Right Allignment
- Undo
- Redo
- Create Hyperlink
- Remove Hyperlink
- Expand to full screen
Please click here to sign up for a free Vimeo account.